This weeks fabulous tutorial was created by my guest crafter Pauline Jackson. And is an excellent idea for a Christmas Card.
Pattered paper
Craft Knife
Craft Ruler
Bone folder
Coloured card Stock
Glue
Double sided Tape
Step 1
Step 2
Take one square and fold corner to corner then repeat with all other 10 pieces then open and lay them flat.
Step 3
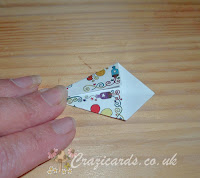
Now take your square and lay it pattern side down. Fold the left and right sides into the middle to meet up with the crease down the middle, this will make a kite shape. Do this with all 11 pieces.
Step 4
When you have finished they should look like this.
Step 5
Take a rectangular piece of card (colour of your choice) and draw a pencil line down the centre.
Then take 3 kite shapes and stick them longest point up onto the card so the tips are on the central line.
Fix another row of 3 kite shapes slightly higher up the card, they should all overlap the first layer.
For the next 2 rows stick two more kite shapes on top of these and you will see the tree shape take form. )Use the images as a guide)
Finally stick the last kite shape to the top. And finish off with a star or other embellishment of your choice. Next you need to create a bucket under the using a piece of scrap cad or paper.
Step 6
Mount your topper on to a blank card and add a sentiment and further embellishments such as ribbons and gems if you wish and then your done.
Here s a couple of cards I made following Pauline's great tutorial, by shaping the kites a little more or a little less you can see different effects to be sure to have a play so that you get the effect that you want.
For these two cards I used the Papermania - Wonderful Christmas 12 x 12 paper pack and a few pearls which I coloured with my Metallic Promarkers


0 comments:
Post a Comment