 As a crafter you are probably just like me and have lots of nice pretty papers sitting in your stash begging to be used.
But finding a good enough excuse to use them can sometimes be rather difficult as they are almost always too pretty to use and I like to just look at them....
"Am I ringing any bells ??".
So for this tutorial I thought I would put some of my pretty papers to good use by making a double diagonal pocket card topper, "that's a mouthful", which can be used as a stand alone card or as a topper on a larger card blank.
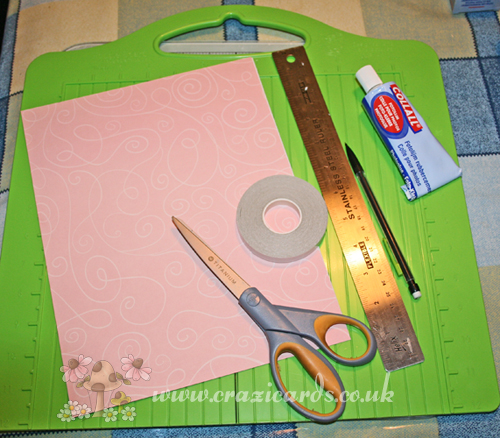
What you will need:

- One A4 sheet of double sided (8 1/4" x 11 3/4") patterned paper. If you have only got single sided patterned paper this is also great I will show you how to fill in the white space at the end of this tutorial.
- Bone folder
- Hougie Board or other score board of your choice
- Scissors
- Adhesive either wet glue , double sided tape or tape runner
- Craft ruler and a pencil
- Additional card stock, stamps and embellishments of your choice to decorate the card front.
Step 1
Score the long side of the patterned paper using your
Hougie Board at the half way point 8 1/8th and fold in half.
As there isn't an exact score line at the half way point the easiest way to ensure you have the centre point is to measure and mark a small pencil mark at the centre point.
You can then line this up with one of your score lines on the Hougie Board. Make sure you don't press too hard or your paper will crack when you fold it.
Or if your in a hurry carefully fold your paper over and marry up the edges and flatten with your bone folder, take care not to tare the paper though....
Step 2

Now turn your paper 90 degrees and score at the centre point and fold your paper into quarters.
Again use your ruler and pencil to find the centre point.
Step 3
Open up your paper and cut along the horizontal fold from the left edge of the paper to the vertical centre score line.
Step 4

Now take the bottom right corner and fold it upwards so that the bottom edge meets the edge of the centre score line. And use you bone folder to make a good crease.
Step 5
Now take the top left corner and fold it down making sure you leave between 1" to1.5" from the centre fold to where you fold down corner.
For this project I left a gap of 1".
The depth of this corner fold determines how much of the patterned paper you see once the card is all folded together. Experiment to find the width you like the best.
Step 6

Take the top left rectangle and fold it over to the right hand side.
Step 7
Now take the left hand bottom rectangle under the folded rectangle on the right bottom.
To make the card rather than the topper :-
At this point if you wish to make this into a card rather than a topper you would take the bottom 2 rectangles and fold them upwards.
Once in place take the right hand rectangle and fold it around the back to create your card.
(I will hold my hands up here and admit I forgot to take a photo of this step - sorry)..
Step 8

Now take the bottom right corner and fold it up over the previously folded corner. And make sure your creases are sharp.
And to finish off fold the bottom rectangle upwards to create your double pockets.
Step 9
Finally you will need to stick the open edges of your card or card topper together using either wet glue, double sided tape or a tape runner.
This will enclose your pockets so you can add tags etc..
Step 10
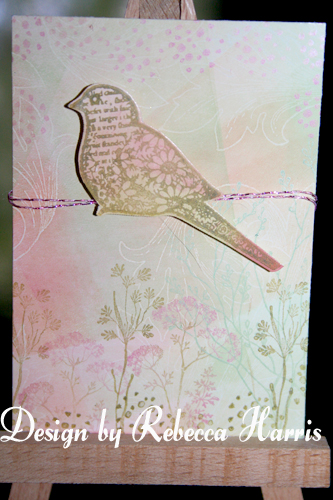
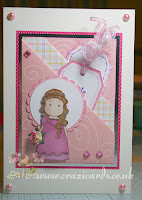
Now for the fun part of decorating your topper or card depending on which route you took at step 7.
I chose to stamp a cute Magnolia stamp which I coloured in using
Promarkers. I also created a couple of tags using the same paper as the topper and used a set of stamps to add sentiments. And I added some pretty matching organza ribbons for the tag pulls.
I finished off with a little
rhinestone bling.
I then mounted this onto my card blank after matting and layering it onto
Silver mirror board. To finish off the full size card I used some matching
pearls.
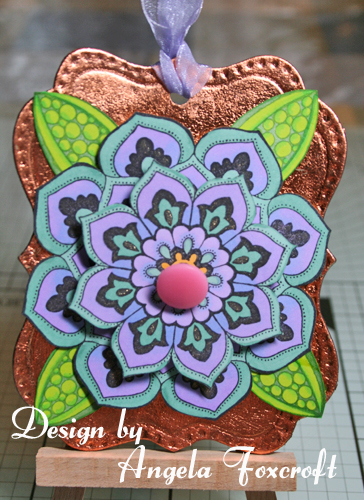
Alernatives
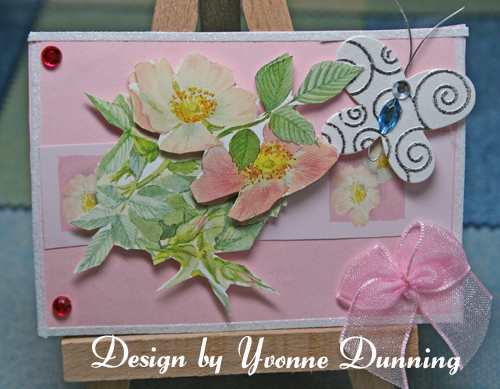
If you only have single sided papers don't panic because you can still turn the white diagonal space you would normally have into a lovely faux patterned paper using a rubber stamp and some coordinating inks.
This was a single sided 12" x 12" Cerise Pink sheet of paper when I started out.
Without cutting any of the paper down to size I followed the guide above and turned my 12" x 12" paper into a 6" x 6" double diagonal pocket topper.
You can make any sized square topper as long as your original paper is square. So 6" x 6" will result in a topper 3" x 3" in size.
As the reverse side of the paper was bright White and not the look I wanted I had to find a way to change it.

So I chose a pretty clear flower stamp from my stash and once all the folds were in place I opened the topper back out until I got back to the Step 7 stage.
I then place the edge of this fold onto a scrap piece of paper and stamped along it with my flower stamp.
And then I lightly coloured in the flowers and leaves using
Aqua Markers to give them a subtle look.
This is an easy way to get rid of the plain white blank space on your topper. You could also add double sided tape and cover in glitter or you could perhaps paint it in a coordinating colour if you wished. The choice is yours really.
This will make a beautiful topper for another card.
You can batch make these toppers with relative ease which is perfect if you make lots of cards to sell or for charity.
I hope you enjoy having a go at this simple but effective topper. And I would love to see your projects if you decide to have a go.
Until next time Happy Crafting xxx