Continuing on with the theme of sprucing up your craft projects using small but effective features today I am going to show you how to do the "Spotlight" technique.
What's is Spotlighting? I hear you say... Well by Spotlighting a small area on your project it creates the effect of magnifying that particular area of your project.
What you will need:

Glass cutting mat
Cuttlebug or similar
Spellbinder circle cutting dies
Low tack tape and 1mm or 2mm foam pads
Stamps of your choice
Memento Tuxedo Black Ink Pad
Clear Wow Powder
Promarkers or other colouring medium
Luxury Felt Card , White card and Black Card
Embellishments of your choice
 Step 1
Choose the stamp you want to use for your project and stamp and emboss your image onto White card.
From you Spellbinder circles set select 2 small circles to use on your project, you can use larger circles if you wish, the choice is yours.
You then need to choose which part of your project you want to "Spotlight". I did this by moving my smallest Spellbinder, cutting edge down, around the image until I found the area I wanted to "Spotlight". Once happy I placed 2 small pieces of low tack tape on the edges of the die to hold it in place ready for cutting.
Step 2

Take your Cuttlebug and cut out the small circle from your stamped image.
Then take a small piece of Black card and cut out the largest of the 2 circles. This creates the mat for your stamped cut out.
Step 3
I found the best way to ensure that both the cut out and the main image match is to pop the cut out back into the main image before colouring in.
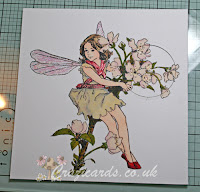
For my image I used Promarkers to colour in my fairy and I used Sakura pens to glitter the wings and the sash.
I then used a Sakura glaze pen to highlight the flowers and I also glazed the glittered wings.
Step 4
Once you are happy with your image you need to put it all together.
First of all mat and layer your main image onto the main White felt card blank using the Black card.
Stamp your sentiment onto the card front directly, if your not comfortable doing this you can also create a separate sentiment and mat it with the black card also.
To create your "Spotlight" adhere the 2 circles together and use foam pads to lift the circle from the main image slightly.
This gives the illusion that the "Spotlight" area is magnified slightly.
Add your embellishments and your all finished. The key is to keep it clean and simple and not to over embellish.
I hope you enjoy trying out this technique, have fun with it and experiment with different size circles for slightly different effects.
Until next time Happy Crafting xx


0 comments:
Post a Comment