Time Flies - Crazicards ATC Swap - January 2012

It has been a while since I last posted. Time really does fly when there is a lot of things going on. I have visited the hospital more times than I care to remember over the last 3 months and still have a few more visits to go but I am pleased to say I do feel a little better in myself which can only be a good thing.

So to say that the blog has been neglected is a big understatement and I intent to change that over the coming weeks, I might not be able to blog as much as I would like but I am going to try and get back to it and get my crafty Mojo bubbling again as it seems to have been lost somewhere between here and the hospital....

Crazicards Swap group has been bubbling along over the last 3 months and starting from today I am going to upload all the fabulous pieces of art my members have made.

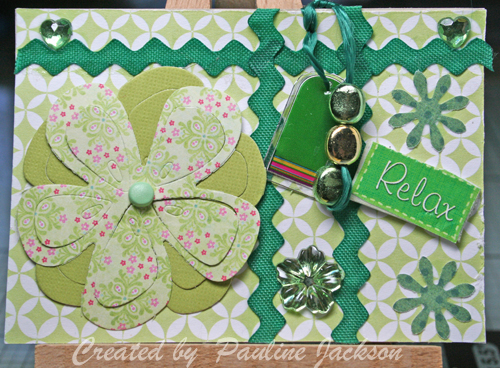
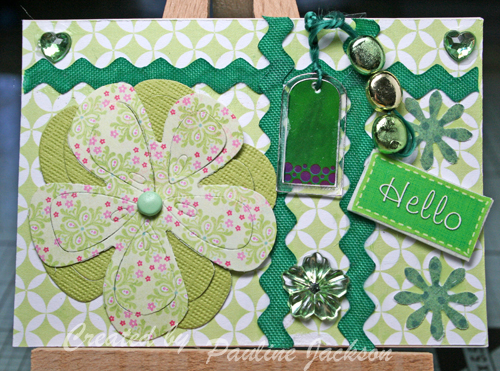
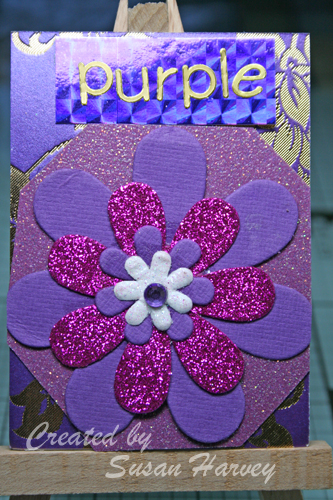
So here for you today are the January ATC swaps, the theme was "My favourite colour":


A Belated Happy New Year

A belated Happy New year everyone - better late than never I know...

New Year didn't get off to a fabulous healthy start unfortunately but things are getting better and I am hoping to be soon back up and running.

I have loads of new tutorial ideas to bring you this year including some great tutorials from so of my crafty friends.

So please become a follower and call back on a regular basis for some great tutorials :O)

Until next time, Happy Crafting x

Merry Christmas & A Happy New Year


I just wanted to write a quick note to wish everyone who reads my blog a Merry Christmas & A Very Happy New Year.

I hope to be back with lots more exciting tutorials and even more group Art from my Facebook swap group in the New Year.

So please keep safe and I hope to see you back here in January safe and sound.

Until next time Happy Crafting xxx

Just for fun - Distressed Stains

I was at a bit of a loose end today so I thought i would have a little play with my new distressed stains and I had a jolly good time too......

I had no idea what I was going to do just that it would be a tag and it had to have distressed stains included. So off I went, trying to remember what Hels Sheridan from Ink on my Fingers did on Create & Craft. I ended up covered in ink but it was worth it...

And these are the two tags I made:


I had loads of fun and am extremely pleased with how these two tags turned out, I should play more often without a theme....

OK that's all from me today have a great evening and keep warm . it's mighty chilly out there.

Until next time Happy Christmas xx

Parchment Christmas Tree Tutorial

I just love parchment but have yet to master the traditional way of parchment crafting. Some of the works of art that I have seen, and they are most definitely works of art, must have taken forever to create as they are so beautiful and intricate.

This week I thought I would show you a a different way to use Parchment to make a Christmas Tree Card.

The effects you can achieve are fabulous and all you need  are a few items to create a fantastic looking card like this one.


What you will need:

Parchment
Stamps of your choice
Scissors
Versamark ink pad
3D glue gel
Green Pearl wow powder
Brown Kraft paper
Peel off stickers
Felt Card for your card base
Gold mirror board
Embossing tool
Embossing mat
Hougie board
Glitter pens
Craft knife
Rhinestones

Step 1


First of all you will need to stamp out several trees with Versamark ink and emboss them all with Green Pearl WOW embossing powder.

Then cut them out ready for step 2.


Step 2

Take one of your tree and place it onto your embossing mat face down.

Now take your embossing tool and gently emboss the back of the tree following the stamped image. This will give you a 3D effect to your trees.

You need to do this with all of your trees.


Step 3


Once you have embossed all of your trees you will need to cut them all out.


Step 4

Next you need to create you main back ground. For this I chose to create a snowflake background.

To do this you need to stamp your snowflakes stamps on to your parchment sheet several times using Versamark ink.

Then take you embossing tool and gently emboss over the Versamark ink as shown in the image to the right.


Once you have embossed all your snowflakes turn over the parchment and there you have a fabulous background ready for your trees.

Mount this onto your brown Kraft paper background and edge with peel offs.

Step 5

Next you will need to start putting you card together.

To do this I tore some strips of parchment paper to make hills for my trees to sit on.


Note: Make sure you tear the parchment carefully as it can run away from you.


Once you have composed your scene using the 3D glue gel, add a sentiment by stamping in versamark then embossing it from the back to ensure the writing is the right way around.


I added a few rhinestones to give my snowflakes a little bling and mounted everything onto your Gold Mirror board.

And there you have it a parchment Christmas Tree card with a difference.

I hope you enjoy having a go at this as it is so much fun and you can do it with any of your stamps, just play and have fun.


Until next time then,  Happy Crafting xxx


Sheena Douglas New Stamps


I was having a play with the fabulous new stamps from Sheen Douglass and here are my 3 creations so far.


This first one I tried out on the back of centura pearl card and it is fabulous for painting. I totally enjoyed painting this and will defiantly be using this set a lot more in the future.


This next one was done on watercolour card and is totally different to anything else I have ever done, and it was so much fun.


This last one will eventually become a 90th birthday card it just needs to be matted onto the card base and a insert added. Another fantastic image from this brilliant set of stamps from Sheena Douglass, I can't wait to see what she brings out next.

Until next time, Happy Crafting xxx

Crazicards Postcard Swap - November 2011

Last months Postcard swap was once a huge success and the art work that was sent in for swaps was just brilliant.

The theme for November was "Christmas Trees". And I received a total of 18 fabulous postcards which is fab considering everyone is in the middle of making their Christmas Cards.


This is the last Postcard Swap for 2011 and I am really looking forward to starting a fresh in 2012 as I know that the swaps are just going to be amazing.

If your interested in joining in please visit my swap group on Facebook here . It doesn't matter what level of crafter you are everyone is welcome.

If your not already a member you will need to register and you will need to accept my friends request so that I can invite you to the swap event. It's as simple as that...

Now here are the fantastic Postcards from the November swap:


Well done ladies these are all fantastic.

Until next time Happy Crafting xx

Related Posts Plugin for WordPress, Blogger...